As this is the second bake, I will be using a recipe from history. After putting myself through metaphorical amateur decorating hell with the Marie Antoinette cupcakes, I decided to take it easy this time with a classic: the Victoria Sponge.
Background
Unsurprisingly, this cake originates from Queen Victoria's reign. The first recorded recipe appeared in the 1861 book Mrs. Beeton's Book of Household Management, written by Isabella Beeton.You can read more about her and her renowned book here. The sponge was created as a teatime treat for children. Victorian teas traditionally consisted of fruit or seed cake (which will eventually be covered in a later blog post- watch this space!), however, there were fears that children might choke on the fruit of the seeds. Thus, the Victoria Sponge was created for upper-class children to enjoy whilst their elders indulged themselves. You can read more about the history of the Victoria Sponge here and here. The latter link, to The Food Timeline website, a site I can promise you'll be hearing about a lot on this blog, includes Mrs. Beeton's original 1861 recipe, should you wish to try it yourself.
Apparently, this was Queen Victoria's favourite cake, so let's get to it!
Trying to keep things as historical as possible, I love Mrs, Beeton's original recipe from The Food Timeline. It follows the basic rule of thumb for creamed cakes: equal weight of eggs, flour, sugar, and butter. I always follow this recipe- not just for the Victoria Sponge- just because it's simple to keep track of. Also in an attempt to be authentic, Mrs. Beeton did not include buttercream in her recipe. Scandalous, I know, as the buttercream is undoubtedly the best bit. However, as neither my mother nor my sister like buttercream, I went with it. If you prefer a recipe with buttercream, have a look at these equally delicious recipes here and here.

First thing's first: grease the cake tins as thoroughly as possible. Better to be over-greased than under-greased! If you don't like too much butter or just prefer not to use it, greaseproof paper works equally as well. It's just my personal preference. Remember to pre-heat the oven! The right temperature depends on which recipe you choose and what type of oven you have.

Once again, everything just goes straight in!

Whisk it all together. It doesn't look particularly appetising, but that's just due to all the air bubbles. Whether or not you have air bubbles in your mixture or not depends on how much liquid you put in. I quite like my cakes to be soft and moist, so I put just a little more than the recipe's recommended amount, but if you prefer something denser and drier, then you can put less liquid in. Just make sure that the mixture is a good consistency.

Pour the mixture in equal amounts into two tins (or more, if you're going for more tiers to your sponge. Just make sure that there's enough mixture in each tin so that you don't end up with a Victoria biscuit). Now it's into the oven.

Out of the oven! Make sure that the sponges are cooked properly by impaling the cake with a knife or cocktail stick. If the knife or stick comes out clean, then the cake is cooked; if not, it needs a few more minutes. Then, tip the cakes out onto a plate. The better greased your tins were to start, the easier this should be. You might need to tap the tin with a knife to coax the cake out. Try to be as gentle as possible to avoid breakages. Then, allow the cakes to cool before you sandwich them together...

...with jam! Depending on how much jam you like, spread as much or as little as you like onto one cake. This can also be a cheeky cheat to cover up any imperfections with jam! If you want to put buttercream in your cake, now's the time to do it. Whichever goes on first doesn't really matter. You might find that one way is easier than the other. I personally prefer to go buttercream, then jam, but it's up to you.

The last step is to delicately place the other half of the cake on top! Don't worry if your alignment isn't quite perfect first time round. The jam (and buttercream, if you have it) should be soft enough that you can slide the cakes around a little. Again, try to be as careful as possible.
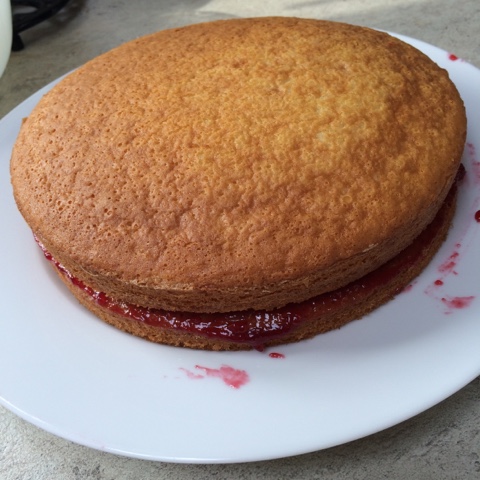
And there we have it! A gorgeous, traditional Victoria Sponge. One of the easiest cakes to bake and an absolute essential for any party.

As much as I love buttercream, you just can't beat a classic. Victoria Sponges are soft, light and moist cakes, and the jam adds an extra sweet treat. 8/10.
I hope that you enjoyed this blog post! These cakes are so easy to make and I seriously recommend that you give them a go. A sweet thing to make all of your friends love you even more. I really appreciate any comments, critiques or suggestions that you may have for me, as well as some recommendations of cakes that you'd like to see me tackle. Just be nice, and I promise not to bite :) I'll try not to take such a long time between updates next time. It's back to history-inspired bakes now. Your teaser is: roses are red (or white?).
See you next time,
Eleanor
:)
<3
:)
No comments:
Post a Comment