Anyway, without further ado, let's welcome today's bake: a York and Lancaster cake, inspired by the Wars of the Roses! This cake features a white rose, for the House of York, and a red rose, for the House of Lancaster. My mother inspired me to make this cake; she baked me a gorgeous White Rose of York cake for my 16th birthday. Whilst my cake isn't quite as glamorous as the one that my mother made, I hope that you like it nonetheless.
Background: the Wars of the Roses
Whilst there is and always has been debate about when the Wars of the Roses began and ended, the general consensus is that they started in 1455 with the First Battle of Saint Albans, and ended in 1487 with the Battle of Stoke Field. The Wars of the Roses were a series of battles fought over the crown of England. The two main rival factions were the House of Lancaster and the House of York. In 1455, the King, Henry VI, was from the House of Lancaster, which had ruled England since 1399. The conflict origins from the reign of Edward III. Edward III had many children, and you can find a family tree here for the House of Lancaster and here for the House of York. Edward III's eldest son, Edward of Woodstock, died in 1376, a year before Edward III himself died. Therefore, Edward III was succeeded by his grandson (Edward of Woodstock's son) Richard II. Richard was not a popular king and, in 1399, in he was deposed by his cousin, Henry of Bolingbroke, who became Henry IV. Henry IV was the son of John of Gaunt, the third surviving son of Edward III. John of Gaunt had been Duke of Lancaster, thus Henry IV became the first monarch of the House of Lancaster. However, John of Gaut's elder brother, Lionel of Antwerp, had children himself. One of these descendants was Anne Mortimer. Anne Mortimer married Richard of Coinsburgh. Richard was descended from the fourth son of Edward III, Edmund of Langley, Duke of York, Richard and Anne's son, Richard Duke of York (of the House of York) argued that his claim to the crown was stronger than Henry IV's descendant, Henry VI. If it sounds complicated, that's because it is. Very complicated. Especially when you add in all the other noble families in England, like the Percys and Nevilles, who took (and changed) sides during the course of the wars.
The Wars of the Roses are generally divided into three distinct stages. The first and longest stage, 1455-1464, begins with Richard Duke of York's first attempts at the crown at Saint Albans; reaches a climax with Richard's son, Edward, seizing the crown and securing his claim at Towton in 1461 to become Edward IV; and ends with Edward consolidating his hold on power by defeating opposition at Hexham in 1464. The second stage, 1469-1471, begins with Edward facing opposition from his former ally, the Earl of Warwick; reaches a climax with Edward losing his crown in 1470 and fleeing to Burgundy (modern-day Belgium, the Netherlands et al); and ends with Edward successfully reclaiming his crown and quashing opposition at the battles of Barnet and Tewkesbury in 1471. The third and final stage, 1483-1487, begins with Edward IV's unexpected death and his brother, Richard, seizing the crown from Edward's sons so that he can become King Richard III; reaches a climax with Richard's defeat and death at the Battle of Bosworth in 1485 at the hands of an obscure Lancastrian, Henry Tudor, who establishes the new House of Tudor and becomes Henry VII; and ends with Henry consolidating his hold on power by defeating the pretender Lambert Simnel in battle at Stoke in 1487.
The idea of a red and white rose to symbolise the two houses was actually invented by Shakespeare. Although the white rose had long been a symbol of the House of York (and actually traces its roots back to the reign of Edward II), the House of Lancaster never actually used a red rose as their standard.
The wars were long. They were awful. They were bloody. There were some fascinating characters involved- from Margaret of Anjou to the Marquess of Montagu to Anne of York. I could honestly talk for hours about people that I love (and hate). This is the first period of history that I really fell in love with, so it has a special place in my heart (despite all the guts and gore- something that I promise won't be portrayed in this cake!) and I wanted to honour it with a spot on this blog.
If you would like to read more about the Wars of the Roses, you can do so here, here, and here.
Let the battle commence!

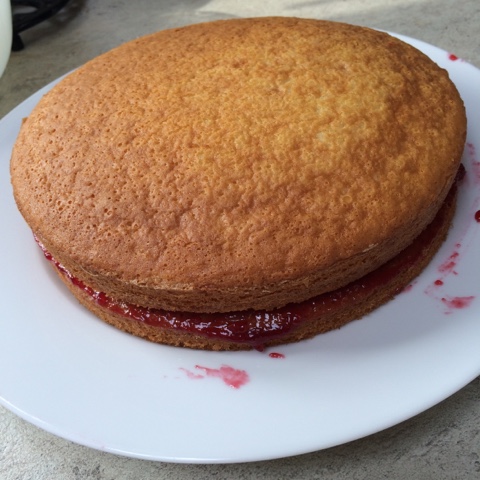
First thing's first is to make your base cake. After the success of my Victoria Sponge last time, I decided to go for it again. It's so simple and easy to make, involving two cakes sandwiched together with jam and/or buttercream. As I said last time, my family is fairly anti-buttercream, so, again, I went without. You can read all about my exploits with the Victoria Sponge on my previous blog post here.

Whilst the cake was baking and cooling, I got to work on making my roses. You can use either flower paste, modelling paste or fondant ('Ready to Roll' icing) for this but I find that modelling paste works best. Firstly, I cut off the amount of paste that I needed, kneaded it to make it soft enough to roll out, and then flattened it slightly (as you can see in the picture above) to make it easier to roll. I then rolled it out to my desired thickness. The thickness of the paste that you need will depend on how thick you want your shape to be and the depth of the mould that you're using (if you're using one, of course).

The next step was to prepare the silicone mould. Silicone moulds are your best friend and, whilst they can look intimidating, they're actually really easy to use. This is a really good video showing you how best to prepare a silicone mould. I lightly dusted the inside of the mould with icing sugar to make it easier to remove the paste. Sometimes you might not need icing sugar, it all depends on the type and quality of both your modelling paste (or flower paste or fondant) and mould.

Next, I pressed down the paste into the mould. Be resilient with this as you want the paste to perfectly take the shape of the mould. For more intricate designs, you may find that you need some icing tools. However, these are not essential and my roses came out fine without me using any tools at all. Remember to remove any excess icing. This makes it easier to extract the paste from the mould.

Now all the extra paste is gone, it's time to get it out!

Pull the mould away and lift the paste out as carefully as you can. This can be quite fiddly and it might take a white. Be patient and go slow to avoid breaking the paste.

Then set your finished shapes onto a plate! The longer you leave them, the harder they will become, so always bear in mind how hard or soft you want your shapes to be.

Now it's time to ice the cake! Same as I did for the modelling paste, I cut off the amount of 'Ready to Roll' icing that I needed and flattened it to make it easier to roll out. This is a really good and easy to follow tutorial of how to cover a cake with fondant.

If you have any imperfections, these can easily be sorted out with a bit of patchwork from leftover bits of icing and water. Alternatively, you can make sure that you cover the bits that aren't quite perfect.

The last step is to add your decorations. I secured the flowers to the cake with a little bit of icing. Two red roses for Lancaster, two white roses for York. Then I piped on the dates of the Wars of the Roses to finish it all off. I'm not biased towards Lancaster, red icing just seemed as if it would show up better on the white fondant!
And there we go! All finished and looking lovely.
I hope that you enjoyed this blog post. Of course, you can adapt this cake as you wish. Maybe you're an unfaltering Lancastrian and only want red roses on your cake. Maybe you want to make the roses look a little more life-like and use some edible paint to add the colourful details to the leaves as my mother did.. Maybe you pledge you allegiance to Henry VII and want to use both red and white paste for the same flower to create the Tudor rose! Whatever you want to do, I hope that you have as much fun baking it as I did.
Thank you for reading! I really appreciate any comments, critiques or suggestions that you may have for me, as well as recommendations for what bakes I should have a go at later. Next time, we're back to bakes from history, and your hint is 'Bugs Bunny' (and no, it's not rabbit pie).
See you soon!
Eleanor
:)
<3
:)